I decided to take the plunge and start playing with Kubernetes. There are a few different configurations that you can choose, I went with a standalone for ease of use and learning. Installation on to my MacBook Pro was pretty simple. To start with, you need a hypervisor of some kind. I am going to go through the steps on my MacBook, and coming soon will go over install on Windows and Linux.
On a Mac running Mac OSX or MacOS, you can use VirtualBox, VMWare Fusion or HyperKit. I have Fusion already installed.
Next, you need to install kubectl. This is the brains of Kubernetes. It allows you work with your applications and cluster resources. While you can install this via HomeBrew, I don’t use it so I went for the curl install instead. This downloads the latest stable release:
curl -LO https://storage.googleapis.com/kubernetes-release/release/$(curl -s https://storage.googleapis.com/kubernetes-release/release/stable.txt)/bin/darwin/amd64/kubectlNext you need to make the kubectl binary that you just downloaded executable:
chmod +x ./kubectlLast but not least, we need to move the executable to your PATH. This allows you to call kubectl without having to know which directory it is in. Makes life way easier!
sudo mv ./kubectl /usr/local/bin/kubectlNext we will install MiniKube…
The github where MiniKube lives is kind enough to provide the curl command for us which automatically moves it into our PATH as well:
curl -Lo minikube https://storage.googleapis.com/minikube/releases/v0.28.0/minikube-darwin-amd64 && chmod +x minikube && sudo mv minikube /usr/local/bin/
Once MiniKube is installed, open Terminal and type: minikube start. The first time you do this, it needs an internet connection to pull down the ISO. It is saved after the first time, so any other times you type minikube start, you do not require an internet connection (unless you deleted the minikube vm).
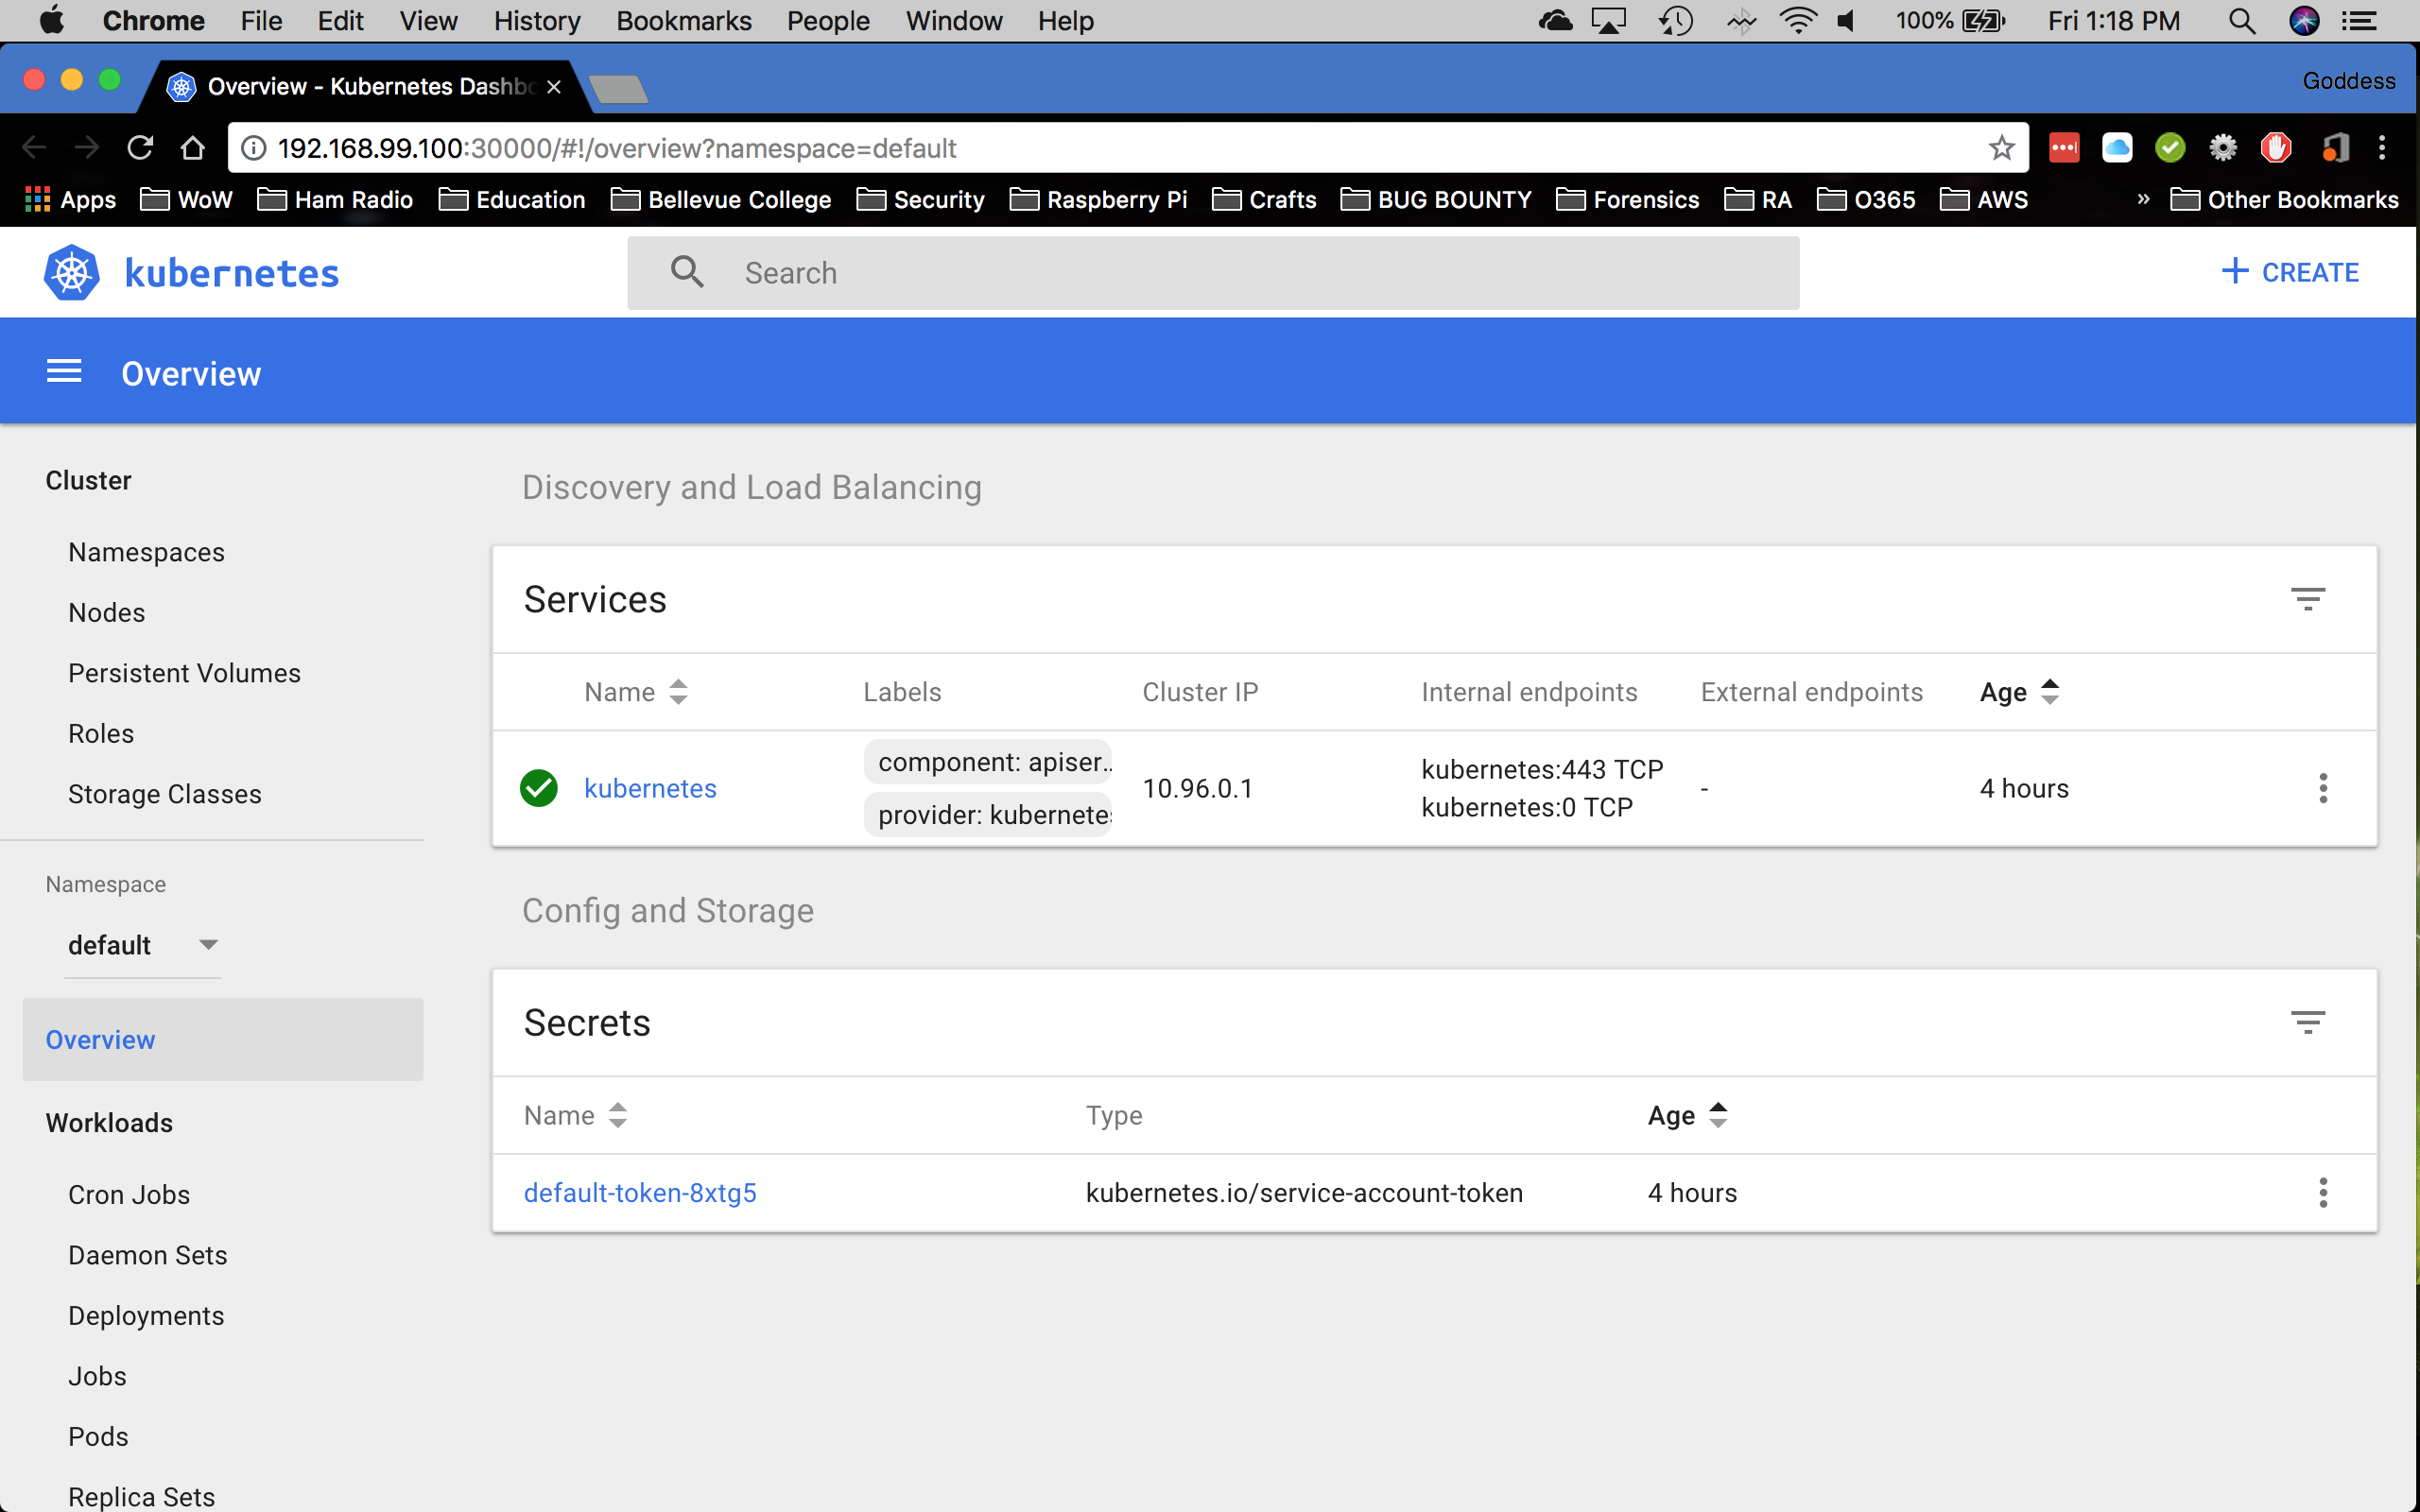
Once the VM has started, you can interact with it through the CLI. If you are like me though, and you can appreciate a nice GUI, Dashboard is a really nice option. The Dashboard is not installed by default, but is easy to install once you have installed kubectl and minikube. With both kubectl and minikube running, run the following to download and install the Dashboard:
kubectl create -f https://raw.githubusercontent.com/kubernetes/dashboard/master/src/deploy/recommended/kubernetes-dashboard.yamlI had to restart minikube after this to get this to work: minikube stop, then minikube start. After that though, I can simply type in: minikube dashboard, and I get this gorgeous dashboard.
Let me know if you try this out, and what you think of Minikube. I think its a great way to get started with Kubernetes!
Resources:


Leave a comment